X

Thursday 8 December 2016

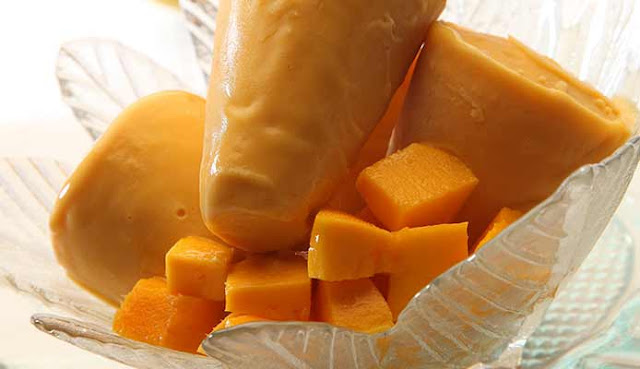
Yummyy Homemade Natural Mango kulfi

Yummyy Homemade Natural Mango kulfi


Mango is one of the favorite fruit of mine, in this summer you can make summer special kulfi with mangoes without any cooking method, just follow this quick recipe step and take the taste of this mango delicious kulfi.

Ingredients :-

1.5 cup full cream milk
200 grams sweetens condensed milk
½ cup low fat cream
½ teaspoon cardamom powder
Saffron strands (optional)
1 cup chopped mangoes

Instructions:-

Take 1.5 cup full cream milk and 1 cup chopped mangoes in a blender.

Add ½ teaspoon cardamom powder and few saffron strands.

Add ½ cup low fat cream

Then add 200 grams sweetened condensed milk.

Grind all the mixture very well in blender till all mixture turn smooth.

Pour mixture in kulfi molds or in a bowl and cover with lid or aluminum foil.

Keep molds in freezer till the kulfi will set.

After freezing kulfi remove kulfi from mold, and cut with a knife.

Garnish it with rose petals or saffron and serve mango kulfi.

You can remove kulfi with the help of a butter knife or put kulfi mold in a running water to remove kulfi easily from the molds.

Making Restaurant Style Mix Vegetable At Home

Making Restaurant Style Mix Vegetable At Home


Step By Step Recipe Of Mix Vegetable


Ingredients Need For Making Mix Vegetable Recipe:
Vegetables:

150 Grams Chopped Carrot/Gajar
150 Grams Peas/Matar
150 Grams Mushroom
200 Grams Chopped Beans
200 Grams Cauliflower
200 Grams Chopped Capsicum
1 large Potato
3 Medium Size Finely Chopped Onion
4 Medium Size Tomato (Puree)
200 Grams Cottage Cheese/paneer
3 Tablespoon Cream
2 Teaspoon Ginger-Garlic Paste

Spices:

1 Inch Cinnamon
1 Big Cardamom
1 Bay Leaf
2 Cloves
1/2 Teaspoon Cumin Seeds/Jeera
1/2 Teaspoon Red Chilli Powder
1/2 Teaspoon Turmeric Powder
1/2 Teaspoon Garam Masala
2 Teaspoon Coriander Powder
Salt As Per Taste
4-5 Tablespoon Oil

Instructions :-

*Chop all vegetables- Carrot (Long Pieces), Mushroom (Long pieces), Beans (Long Pieces) ,Cauliflowers (Flowers), Potato (Small Pieces), Capsicum (cubes), Paneer (Cubes), Tomato (Puree), Onions (Finely Chopped)

*Boil carrot, mushroom,beans, cauliflowers and peas in a pot pan with adding half teaspoon salt and oil.

*Boil vegetables till they cook 90 percent, after that strain water from vegetables.

*Heat 3 tablespoon oil in a pan or kadhai and add cumin seeds, big cardamom, cinnamon and cloves, saute them for 2 minute in hot oil.

*Now add chopped onions, capsicum and potato in kadhai and mix them well.

*Cover the lid of pan and cook them for 5-7 minutes or till they perfectly cook and become soft.

*Now add tomato puree and ginger garlic paste in pan and again cover the lid of pan till all mixture leaves the oil in pan.

*Add all spices red chilli powder, turmeric powder, garam masala, coriander powder and salt as per taste, saute them for a minute.

*Add all boiled vegetables in pan and mix them well, without breaking them.

*Now add chopped paneer cubes and cream in vegetables, mix properly.

*Finely you can also add 1 teaspoon of kitchen king masala for more spicy vegetable.

*Mix all ingredients well and again cover the lid of pan for 5 minutes, so that all vegetables will absorb the aroma anad taste of spices.

*Switch of the flame and serve tasty creamy restaurant style mix vegetable with roti/chappati or naan.

Friday 2 December 2016

Causes ,Symptoms And Best Home Remedies for Menstrual Cramps

Causes ,Symptoms And Best Home Remedies for Menstrual Cramps


What are menstrual cramps?
Menstrual cramps are pains in the belly and pelvic areas that are experienced by a woman as a result of her menstrual period. Menstrual cramps are not the same as the discomfort felt duringpremenstrual syndrome (PMS), although the symptoms of both disorders can sometimes be experienced as a continual process. Many women suffer from both PMS and menstrual cramps.

Menstrual cramps can range from mild to quite severe. Mild menstrual cramps may be barely noticeable and of short duration and are sometimes felt just as a sense of heaviness in the belly. Severe menstrual cramps can be so painful that they interfere with a woman's regular activities for several days.
Menstruation is a natural part of a woman’s life, but painful menstrual cramps are a very annoying problem for many. While menstrual cramps are rarely a cause for concern, if severe they can disrupt regular activities.

Menstrual cramps are due to a hormone-like substance called prostaglandin that causes the uterine muscles to contract during menstruation.

Cramping can cause a dull or throbbing pain in the lower abdomen, and radiate pain to the lower back and thighs. Cramps generally subside after the first two to three days of the period. Some women feel cramps just before the onset of their cycle, too.

Some factors can increase the chances of suffering from menstrual cramps, such as reaching puberty at an early age, genetics, heavy bleeding during periods and unhealthy habits like smoking, a sedentary lifestyle, consuming excess alcohol and taking illegal drugs.

For some women, menstrual cramps may reduce or completely disappear after childbirth.

How common are menstrual cramps?
Menstrual cramps of some degree affect more than an estimated 50% of women, and among these, up to 15% would describe their menstrual cramps as severe. Surveys of adolescent girls show that over 90% of girls report having menstrual cramps.

What causes menstrual cramps?
Each month, the inner lining of the uterus (the endometrium) normally builds up in preparation for a possible pregnancy. After ovulation, if the egg is not fertilized by a sperm, no pregnancy will result and the current lining of the uterus is no longer needed. The woman's estrogen and progesterone hormone levels decline, and the lining of the uterus becomes swollen and is eventually shed as the menstrual flow and is replaced by a new lining in the next monthly cycle.

When the old uterine lining begins to break down, molecular compounds called prostaglandins are released. These compounds cause the muscles of the uterus to contract. When the uterine muscles contract, they constrict the blood supply (vasoconstriction) to the endometrium. This contraction blocks the delivery of oxygen to the tissue of the endometrium which, in turn, breaks down and dies. After the death of this tissue, the uterine contractions squeeze the old endometrial tissue through the cervix and out of the body by way of the vagina. Other substances known as leukotrienes, which are chemicals that play a role in the inflammatory response, are also elevated at this time and may be related to the development of menstrual cramps.

Why are some cramps so painful?
Menstrual cramps are caused by the uterine contractions that occur in response to prostaglandins and other chemicals. The cramping sensation is intensified when clots or pieces of bloody tissue from the lining of the uterus pass through the cervix, especially if a woman's cervical canal is narrow.

The difference between menstrual cramps that are more painful and those that are less painful may be related to a woman's prostaglandin levels. Women with menstrual cramps have elevated levels of prostaglandins in the endometrium (uterine lining) when compared with women who do not experience cramps. Menstrual cramps are very similar to those a pregnant woman experiences when she is given prostaglandin as a medication to induce labor.

What are the symptoms of menstrual cramps?
Menstrual cramps are pains that begin in the lower abdomen and pelvis. The discomfort can extend to the lower back or legs. The cramps can be a quite painful or simply a dull ache. They can be periodic or continual. Pain also may be felt in the lower back, inner thighs, or hips.

Menstrual cramps usually start shortly before the menstrual period, peak within 24 hours after the onset of the bleeding, and subside again after a day or two.

Menstrual cramps may be accompanied by a headache and/or nausea, which can lead, although infrequently, to the point of vomiting. Menstrual cramps can also be accompanied by either constipation or diarrhea because the prostaglandins which cause smooth muscles to contract also affect the intestinal tract. Some women experience an urge to urinate more frequently.

How are menstrual cramps diagnosed?
The diagnosis of menstrual cramps is usually made by the woman herself and reflects her individual perception of pain. Once a woman has experienced menstrual cramps, usually with the adolescent onset of her monthly menstrual flow (menses), she becomes well aware of the typical symptoms. If there are other medical conditions contributing to menstrual cramps (secondary dysmenorrhea), the doctor may suggest diagnostic testing including imaging studies.

What if the cramps are very severe?
If a woman's menstrual cramps are too severe to be managed by these strategies, her doctor might prescribe low doses of birth control pills (oral contraceptives) containing estrogen and progestin in a regular or extended cycle. This type of approach can prevent ovulation (the monthly release of an egg) and reduce the production of prostaglandins which, in turn, reduces the severity of cramping and causes a light menstrual flow.

Use of an IUD that releases small amounts of the progestin levonorgestrel directly into the uterine cavity, has been associated with a 50 percent reduction in the prevalence of menstrual cramps. In contrast, IUDs that do not contain hormones, such as those containing copper, may worsen menstrual cramps.

Here are the top 10 home remedies for menstrual cramps.
To ease the pain and discomfort, there are several over-the-counter medicines. However, some simple and natural home remedies can be equally effective and relieve symptoms faster, or even prevent cramps.

1. Heat
Applying heat on the lower abdomen is the easiest way to control menstrual cramps. Heat helps relax the contracting muscles in the uterus.

Place a heating pad over the lower part of your abdomen and lower back. You can even use a regular plastic bottle filled with hot water. Apply the heat until you feel more comfortable.
Alternatively, soak a towel in water, wring out the excess water and then heat it in the microwave for one minute. Place it on the lower abdomen until the towel cools. Repeat every few minutes until the pain is gone.
Even taking a hot shower may relieve pain and make you feel more relaxed.

2. Ginger
Ginger is a wonder herb that can effectively ease menstrual cramps. This herb plays a key role in lowering the levels of the pain-causing prostaglandins. It also helps fight fatigue associated with premenstrual syndrome and can make irregular periods regular.

Grate a small piece of ginger and boil it in a cup of water for five minutes. Strain it and add a little honey and lemon juice. Drink this tea three times a day during your menstrual cycle.
You can also add ginger in your food while cooking or suck on some ginger candies.

3. Basil
Basil is another very effective herb for reducing menstrual pain and cramps. The caffeic acid present in basil has analgesic, or pain-killing properties.

Add one tablespoon of basil leaves to one cup of boiling water. Cover tightly and allow it to cool. Drink this every few hours to ease cramps.
Alternatively, crush a handful of basil leaves to extract the juice. Add two teaspoons of the juice to one cup of warm water. Drink this three times daily while having pain.
You can also add fresh basil leaves to your food.

4. Cinnamon
Cinnamon has antispasmodic, anticlotting and anti-inflammatory properties that can relieve menstrual pain. Plus, cinnamon is an excellent source of dietary fiber, calcium, iron and manganese.

Make cinnamon tea by stirring one-fourth teaspoon of cinnamon powder into a cup of hot water. Let it sit for up to five minutes, add a little honey and then sip it slowly. Drink two to three cups of cinnamon tea one to two days before your period starts to prevent cramps.
Add one-half teaspoon of cinnamon powder and one tablespoon of honey to a glass of warm water. Drink it three times during the first day of your period to relieve pain.

5. Fennel
The antispasmodic, phytoestrogenic and anti-inflammatory properties of fennel can help relax the muscles in the uterus, which in turn relieves cramping and discomfort.

Add one teaspoon of fennel seeds to a cup of boiling water.
Simmer the mixture on low heat for five minutes.
Remove from heat and strain the tea.
Add one teaspoon of honey and mix well.
Drink this herbal tea two times daily beginning three days before the expected start date of your cycle. Continue drinking it as needed for pain. Drink it hot for best results.

6. Blackstrap Molasses
Another time-tested remedy for menstrual cramps is blackstrap molasses. Being rich in calcium, iron, potassium, magnesium, manganese, vitamin B6 and selenium, blackstrap molasses helps reduce blood clots and soothe the muscles of the uterine walls. This in turn lessens cramps during menstruation.

Add one to two teaspoons of blackstrap molasses to a cup of warm milk.
Drink it as soon as you start having cramps and continue as long as needed.

7. Chamomile Tea
Chamomile tea has anti-inflammatory and antispasmodic properties that help relax the uterus and ease the spasmodic contractions that cause pain during menstruation.

Bring one cup of water to a boil. Pour it into a cup containing a chamomile tea bag.
Cover and let it steep for 10 to 15 minutes.
Squeeze out the tea bag and add some lemon juice or honey as desired.
Drink at least two cups of chamomile tea a day during the week before your period.

8. Parsley
Parsley contains two compounds, apiol and myristicin, that are highly effective at stimulating the menstrual process and relieving cramps. Plus, it can help regulate irregular cycles.

Put one-fourth cup of fresh parsley in a mug. Pour in one cup of boiling water.
Let it steep for five minutes.
Strain the solution and drink the tea immediately.
Drink this tea twice a day during periods to minimize pain.

9. Flaxseed
Flaxseed is great for reducing the intensity of menstrual cramps. The essential fatty acids in flaxseed help stabilize the production of progesterone. Plus, flaxseed can improve uterine function and help treat fertility problems.

When suffering from menstrual cramps, consume one to two tablespoons of flaxseed daily. You can sprinkle ground flaxseed over a salad, cereal and yogurt or put it in a smoothie.

10. Papaya
A potent anti-inflammatory agent, papaya is very helpful in treating menstrual cramps. Also, it has nutrients like carotene, iron, calcium and vitamins A and C that help soothe the uterine walls and ease muscle contractions. Just before and during your period, include papaya in your diet to minimize or eliminate pain.

Along with these remedies, you can do yoga and cardiovascular exercises to help get rid of menstrual cramps. Also, do not forget to drink plenty of water. If you experience severe menstrual cramps on a regular basis, consult a doctor.

Why Skin Vitamins Is Good For Our Skin?

Why Skin Vitamins Is Good For  Our Skin?

Skin Vitamins:
Vitamins play a big role in bringing about healthy skin and in the prevention of acne. While a deficiency of vitamins is not a major problem for most individuals, you will require more than the bare minimum RDA to deal with acne. A healthy diet is an essential step to healthy and glowing skin. However, diet may not always be sufficient. You may also need to topically apply vitamins for the skin to show good results.

Types of Vitamins:
Vitamins mainly come into two categories: fat soluble and water soluble vitamins. Fat soluble vitamins (vitamins K, E, D and A) dissolve into the fat and the remaining is stored in the liver. You are not required to consume these vitamins daily as they can be stored in the tissues of fat for quite some time. In fact, if you consume too much, they can also turn toxic. Water soluble vitamins like vitamin B-complex and vitamin C are not stored in the body and hence, need to be replaced daily. Moreover, if you consume these in excess, you may not cause too much harm to yourself (because you will expel whatever is not absorbed by the body through urination).

Vitamins and Skin:
The right combination of minerals and vitamins is essential along with other things to combat aging of the skin. For vitamins to be most effective on your skin, you need to take them orally or apply them topically to the skin. Do not get deceived by the vitamin products that say they can treat anything. Some vitamins tend to compete for absorbance, while others will be effective only when taken in large amounts.

Pollution, sun rays and cosmetics can damage your skin, if you do not take proper precautions. Usually, a multivitamin gives sufficient amount of the vitamins you need and do not get from your diet. However, if you still have problems with dry skin or wrinkles, you could consult your doctor about taking higher doses of the necessary supplements. Some of the vitamins for smooth skin include beta-carotene, vitamins C and E, dimethylaminoethanol (DMAE), biotin, and niacin.

Hormonal Acne:
Hormonal acne is a skin condition, which mainly affects women when an excess of oil is stimulated from the sebaceous glands by testosterone. This causes the pores to get clogged and bacteria to grow. Vitamins play an important part in combating hormonal acne. Some of the important vitamins and minerals for hormonal acne include selenium, chromium, zinc, vitamin K, E, D, C, A and B-complex.

Itchy Skin:
An itchy skin can be very frustrating and annoying. However, there are many natural ways to combat it like including certain vitamins in your diet. You can find these vitamins in various foods. Some of the vitamins for itchy skin are vitamins E, A and C. Mineral such as zinc and biotin are also effective.

Clear Skin:
Certain vitamins are necessary for skin clarity and health. Although a multivitamin supplement is good, it will be better for you to add other nutrients to give you a balanced diet. Foods like lean meats, dark green vegetables, nuts and fresh fruits are good sources of vitamins for the nutrition of the skin. Some of the best vitamins to take for clear skin include vitamins A, B, C, D, E, K and bioflavonoids.

Glowing Skin:
Taking vitamins for a glowing skin is also effective. Vitamins C and E can significantly improve the health of the skin from the damaging exposure of the sun. Vitamin A is also essential for glowing skin, and the deficiency of it can leave the skin flaky and dry. It was also found that topical melatonin along with vitamin C and E protects the skin from erythema that is ultraviolet induced.

5 Best Vitamins For Beautiful Skin:
Nourish your skin:
You’re diligent about fruits, veggies, and multis, but your skin care routine is still missing vitamins.

Research shows that certain nutrients are essential for preventing and reversing many signs of skin aging. A well-balanced diet is important, of course eating a variety of healthy foods helps keep skin supple and glowing. But the fact is, "the body delivers only a certain percentage of vitamins to your skin, no matter how much you ingest,  there's no way to send them straight to your crow's feet or brown spots.

The solution: Applying vitamins topically to deliver maximum anti-aging benefits everything from improving texture and tone to fading under-eye circles. Follow this user's guide to the letter, and soon your skin will look better than ever.

1. Vitamin A for wrinkles:
Best overall age-fighter

Find it in: OTC lotions, night creams (vitamin A derivatives are known as retinoids), and prescription products

Proven to:
Reduce wrinkles, fade brown spots, and smooth roughness. "There are more than 700 published studies on retinoids they're tried-and-true ingredients. Anyone who wants younger-looking skin should use one.

How to use:
Apply your retinoid at night sunlight inactivates most forms of vitamin A. Prescription retinoids work fastest, within four to eight weeks. The downside: They're irritating, causing redness, scaling, and flaking that can last for weeks or longer. OTC products are best for beginners; you'll experience fewer skin care side effects because the retinol they contain is slowly converted to retinoic acid, the active ingredient in prescription creams. To avoid irritation, apply an OTC or prescription retinoid every second or third night, at least for the first two weeks, and build up to nightly use. Apply sparingly; a pea-size amount is enough to cover your entire face.

2. Vitamin B3 for redness:
Boosts hydration to reduce redness

Find it in: Lotions, creams, and serums. It's often called niacinamide on the label.

Proven to:
Increase production of ceramides and fatty acids, two key components of your skin's outer protective barrier. "As that barrier is strengthened, skin is better able to keep moisture in and irritants out making B3 a great ingredient if your complexion is dry or sensitive. In one study, a moisturizer with niacinamide improved the flushing and blushing of rosacea, a common condition that can worsen with age. Another B3 skin care benefit: It inhibits the transfer of pigment to skin cells, minimizing dark spots.

How to use:
For maximum results, apply B3 vitamins in the morning and evening. To reduce irritation from your retinoid, use it in conjunction with niacinamide. "Mix them together in the palm of your hand before applying they won't inactivate each other. Besides decreasing side effects, the combo produces superior anti-aging benefits.

3. Vitamin C for spots:
All-around anti-ager

Find it in: Moisturizers formulated to keep vitamin C stable (opaque, airtight containers are ideal). Look for C near the middle of the ingredients panel to help ensure the 5% or higher concentration needed to see skin care benefits.

Proven to:
Mop up the free radicals that trigger wrinkling, sagging, and other aging changes. Vitamin C also helps smooth and firm skin and fade brown spots. In one study, women who treated sun-damaged skin with a C cream for six months saw significant improvement in fine lines and discoloration. Though the benefits of retinoids (see vitamin A) and vitamin C sound similar, using both delivers more complexion perfection. "Skin aging occurs in various ways, so you need multiple forms of defense and repair.

How to use:
Apply vitamin C in the morning before sunscreen to shield your skin from any UV-generated free radicals that get by your sunblock.

4. Vitamin E for moisture:
Eases dryness and bolsters skin's UV defense

Find it in: Sunscreens and after-sun products. The best anti-aging products contain at least 1% vitamin E, so it will be listed near the middle of the ingredients panel.

Proven to:
Quell dryness by helping skin retain its natural moisturizers. Also, vitamin E's potent ability to neutralize damaging free radicals has earned it the moniker "the protector." A slew of skin care studies document its superstar status. In one, E significantly reduced the number of these unstable molecules created after exposure to cigarette smoke. Others show that when it's used before UV exposure, skin is less red, swollen, and dry.

How to use:
Apply before and after serious sun exposure. A single strong blast of UV light can destroy half the skin's natural supply of E, so shore up defenses by slathering on a sunscreen supplemented with E and C before going into the sun the C helps ensure effectiveness. An after-sun salve with E helps, too, says Oceanside, CA, a vitamin E expert. Some studies show that the anti-inflammatory action kicks in to reduce damage even after you've been in the sun.

5. Vitamin K for dark circles:
For younger, brighter eyes

Find it in: Eye creams that also contain retinol.

Proven to:
Possibly help lighten under-eye circles. Fragile capillaries that allow blood to leak into skin are considered one cause of under-eye circles, and vitamin K (aka phytonadione) may put the skids on this seepage by controlling blood clotting. Daily use of a K cream significantly lightened circles after 4 months in one study, but because the cream also contained retinol, researchers aren't sure which ingredient deserves credit for the improvement retinol alone thickens the translucent under-eye skin (making it harder to see the dark blood vessels below) and lightens melanin that makes circles more prominent. Still, it can't hurt to try a cream that contains vitamin K and retinol;  the retinol may enhance K's ability to penetrate skin and knock out darkness.

How to use:
 Apply nightly. First allow skin to become acclimated to the retinol use once or twice the first week, and add a night every week after.

How to Heal Cracked Feet Fast.

How to Heal Cracked Feet Fast.

Cracked Heels:
Cracked heels are a sign of lack of attention to foot care rather than just overexposure or lack of moisturizing. Medically, cracked heels are also known as heel fissures. Fissures are regular linear cut wounds and mostly affect the surface level which comprises of the epidermis. Sometimes it may get deep into the dermis and become painful. Excessive pressure on the feet pads make the feet want to expand sideways. As the skin, surrounding the sides of the feet are dry they crack and cause cracked heels. Appearances of dry cracked heels also indicate zinc and omega-3 fatty acid deficiency.

Though cracks in the skin may arise anywhere in the body the most common is area is the rim of the heel and web of toes, which happen to be the most frequently or constantly used parts of our body. Dry skin or xerosis is one of the most common causes that lead to cracked heels .The other key reason being thick or callus skin around the rim of the heel. Most of the foot problems arise due to neglect and oversight with regard to feet care. Cracked feet, corns and other common feet ailments can be attended to and are easily avoidable.

Cracked heels are not a harmful in anyway except when the fissures or cracks are deep, and tend to become painful and the skin begins to bleed. This could lead to infection and is an avoidable situation mostly for those already suffering from chronic ailments such as diabetes or lowering immune system due to age or illness which may retard the treatment of cracked heels.

Cracked heels are a common occurrence for senior citizens or people who are constantly on their feet thus exerting pressure on the feet pad. In addition to this, sebum production decreases with age and so seniors tend to suffer from dry and cracked heels. Excessively dry skin, peeling skin, and dry and cracked skin on the heels are some of the most common skin problems that seniors face. Dry skin on the heels is often a recurrent problem. It can affect either both the heels or one of the heel. But most commonly, cracked heels affect both the feet.

Cracked feet, also known as heel fissures, are a common problem for people of all ages, mostly caused by lack of moisture.

Other causes include, standing for long hours, using harsh soaps, cold weather, continuous exposure to water, being overweight, and wearing improper footwear. Conditions like eczema, psoriasis, thyroid disease and diabetes can also contribute to this problem.

Some of the signs and symptoms of cracked feet are red or flaky patches, peeling skin, itchiness, bleeding from the cracks and pain.

Cracked feet look unattractive and, in some cases can lead to infection and extreme pain. The problem can be taken care of with some simple home remedies.

Symptoms for Cracked Heels:

Signs and symptoms that surface on the skin are simple indicators of a faulty internal activity or an external abuse. If one observes the body and its manifestations minutely one can avoid disease and disorders by treating them before they take on a destructive path. Similarly, feet care calls for a little attention and when the feet finds it lacking they indicate the following signs to show the feet could do well with some care.


• Red or Flaky Patches: This is often one of the first symptoms of dry cracked heels and if it is ignored, the condition may worsen in time. Dry skin is also vulnerable to dry skin infections and so it is important to treat the condition right away.


• Peeling and Cracked Skin: This symptom generally follows the first symptom of red or flaky skin. Peeling and cracked skin is a definite sign of dry cracked heels and immediate measures must be taken to remedy the condition. Make sure that you do not try to pull off the pieces of dry skin as this could damage the skin it is attached to. If you need to get rid of a long piece of dead sin you can use a small pair of scissors to slowly and carefully clip away the dead skin.


• Itchy Skin: Itchy skin is caused by the abnormal shrinking of the upper layers of dry skin. This excessive shrinking causes the stretching of the skin below and around the affected areas and this results in general discomfort and itchiness. You will have to get rid of the upper layers of dead skin before you start any type of treatment for dry cracked heels.


•Bleeding or Discharge from Cracks: Bleeding or discharge from cracks in your heels is a very serious problem as it indicates that the cracks not only affect the upper layers of the skin but also the lower layers of tissue. Deep cracks in the heels will also increase an individual’s risk of suffering from a skin infection in this area. Wearing closed shoes without socks while you have dry and cracked heels will only serve to further increase one’s risk of suffering from a dry and cracked heels fungus infection as closed shoes provide fungus and yeast infections with the perfect habitat to reproduce.

Causes for Cracked Heels:

Most Common Causes that Lead to Cracked Heels
Here is a compilation of the most common causes that lead to cracked heels:
• Naturally dry skin or thick dry skin (callus) around the heel that is more likely to crack is often due to excessive feet activity.
• Prolonged standing at work or home .Hard floors may also cause cracks in the feet.
• Being overweight may increase the pressure on the normal fat pad under the heel, causing it to expand sideways and if the skin lacks flexibility the pressure on the feet lead to cracked heels.
• Back-open sandals or shoes allow the fat under the heel to expand sideways and increases the possibility of cracks on the heels.
• Disease and Disorders-Athlete’s foot, Psoriasis, Eczema, Thyroid disease, Diabetes and some other skin conditions may also cause cracked heels.
• Continuous exposure to water- Water, especially running water, can rob the skin of its natural oils and this can leave the skin dry and rough. Standing for prolonged periods in a damp area such as a bathroom can cause dry and cracked heels.
Here is a list of some other reasons that may lead to cracked heels:
• Age - Thick dry scaly skin lose elasticity with age and thus cracks have higher incidence with age.
• Ill fitting shoes, standing for a long time or change in walking posture.
• Unhygienic circumstances or conditions
• Unhealthy, dry scaly skin due to climate or diseases
• Deficiency of vitamins, minerals and zinc

Here are the top 10 ways to heal cracked feet.

1. Scrubbing
Scrubbing the hard, dead skin away helps a great deal in getting rid of cracked feet. Before scrubbing, soak your feet in warm soapy water to help soften the skin and make it easier to scrub.

Before going to bed, mix some liquid soap in a foot tub filled with warm water.
Soak your feet in this warm soapy water for about 20 minutes.
Use a pumice stone to gently scrub off the loosened dead skin cells.
Rinse off your feet with clean water and pat dry with a soft towel.
Apply some foot cream or moisturizer and wear a pair of clean cotton socks overnight.
Follow this remedy daily until your cracked feet are healed completely.

2. Coconut Oil
Coconut oil is another incredible remedy for dry, cracked feet. It helps moisturize your feet and also fights fungal and bacterial infections, thanks to its antimicrobial and antifungal properties.

Before going to sleep, soak your feet in warm water and scrub with a loofah.
Dry your feet thoroughly and then apply coconut oil generously on your feet.
Put on a pair of clean, cotton socks for the night.
The next morning, remove the socks and wash your feet.
Do this daily for several days until you are satisfied with the results.
You can also use olive oil in the same way.

3. Mentholated Rub
This is another popular home remedy for cracked heels because of the many essential oils that it contains. It also helps heal toenail fungus.

Apply some mentholated rub on clean, dry feet before going to bed.
Put on a pair of socks and leave it on overnight.
The next morning, remove your socks and wash your feet with warm water.
Repeat daily for a few days until the rough skin peels off.

4. Paraffin Wax
You can also use paraffin wax to remove the dead, dry skin and cure cracked feet. It will also work as a natural emollient to soften the skin and retain the natural oils on the skin.

Heat some paraffin wax in a microwave or double-boiler and add an equal amount of mustard oil or coconut oil to it.
Apply this thick creamy paste on the cracks and put on a pair of socks.
Leave it on overnight and wash your feet thoroughly in the morning.
Follow this remedy daily for one or two weeks.

5. Glycerin
Due to its moisturizing and humectant properties, glycerin works as a great remedy to get rid of cracked feet.

Make a mixture of equal parts of glycerin and lemon juice. You can also add some rose water.
Apply it on your feet.
Leave it on for 20 minutes and wash it off with water.
Follow this remedy daily for about two weeks.

6. Epsom Salt
Epsom facilitates the process of healing cracked feet as it promotes circulation. Plus, the magnesium in Epsom salt promotes skin health and draws out toxins.

Add one-half cup of Epsom salt in a foot tub filled with warm water.
Soak your feet in it for 10 minutes.
Gently rub your feet with a pumice stone for a few minutes.
Put your feet back in the Epsom salt soak for another 10 minutes.
Finally, dry your feet thoroughly and apply a moisturizer or petroleum jelly.
Repeat daily for two or three days.

7. Vinegar
Vinegar can also be used to treat cracked feet as the acetic acid in vinegar helps soften the skin which in turn makes exfoliation easier. Vinegar foot soaks are also beneficial for tired feet.

Mix one-half to one cup of white or apple cider vinegar in two cups of water. Soak in it for 10 to 15 minutes and then slough off the dead, dry skin with a pumice stone or foot scrubber. Then, wash your feet and pat dry thoroughly. Finally, apply a moisturizer or petroleum jelly.
Another option is to make a natural foot scrub. Mix a handful of coarse rice flour, a few tablespoons of raw honey and apple cider vinegar to make a thick paste. You can also add one tablespoon of olive oil to it. Wash your feet well and then gently massage your feet with this paste for a few minutes. Wash it off with lukewarm water. Repeat once or twice a week.

8. Lemon
Lemon juice has a very mild natural acidic property that can help get rid of dead and dry skin cells from your feet. It will also make your skin soft and beautiful.

Add some lemon juice to warm water. Soak your feet in this solution for about 10 minutes. Gently scrub your feet with a soft foot brush. Wash and dry your feet completely and then apply some moisturizer.
Repeat a few times a week.
Another option is to add the juice from one lemon to one teaspoon of petroleum jelly and apply this mixture to your dry and cracked heels. Before applying, it is essential to wash your feet and pat them dry. Follow this remedy once or twice daily.
You can also create a foot scrub by mixing together five tablespoons of sea salt, one tablespoon of olive oil and juice from one lemon. Apply it on your cracked feet. Leave it on for 15 minutes and then rinse it off with lukewarm water. Follow this remedy once or twice a week to get positive results.

9. Banana
Overripe banana can be put to good use by blending them into a paste and applying on your cracked feet. They will help soften and moisturize your skin.

Blend one or two overripe bananas in a blender to form a thick, creamy paste. You can also add half an avocado.
Apply this paste on your feet.
Leave it on for about 15 to 20 minutes.
Wash your feet thoroughly, alternating with lukewarm and cold water.
Follow this remedy on a daily basis to prevent and treat dry and cracked heels.

10. Oatmeal
You can treat cracked feet with a homemade foot scrub made from oatmeal. It will help remove dead skin and also keep your feet moisturized.

Mix one tablespoons of powdered oatmeal and some jojoba oil to make a thick paste. Apply the paste to your feet, with special attention to the heels and callused areas. Leave it on for about 30 minutes. Rinse it off with cold water and pat dry your feet. Do this every other day until your cracked feet are healed completely.

Another option is to mix one-quarter cup each of honey and olive oil and one-half cup of all-purpose flour in one cup of ground oatmeal. Soak your feet in warm water, exfoliate and then apply this paste. Leave it on for 30 minutes before washing it off with lukewarm water and follow with a moisturizer or foot cream. Repeat a few times a week.

These remedies will help restore the skin on your feet to a smooth and supple appearance. If you do not get positive results within a week, consult a podiatrist to find out the exact cause and get proper treatment.

You Know How to Deal with Epilepsy??

You Know How to Deal with Epilepsy??

Epilepsy is a neurological disorder that causes repeated seizures or fits. Seizure episodes can last for very brief periods to long periods. The seizures occur due to bursts of electrical activity in the brain that are not normal. Experts do not yet know what causes epilepsy.

The main symptom of epilepsy is repeated seizures that happen without warning. This can lead to convulsions and problems with muscle control, movement, speech, vision or awareness. At times, a person may also faint or lose consciousness.

Often, the onset of epilepsy happens during early childhood or after age 60, but it can occur at any age. Certain factors increase your risk of epilepsy, including family history, a head injury, strokes and other vascular diseases, brain tumors, dementia, brain infections, lead poisoning, prenatal brain development problems, and Alzheimer’s disease.

Epileptic seizures can be scary, but they do not cause mental illness or intellectual disability. In addition, not everyone who has seizures has epilepsy. Usually, at least two or more seizures within 24 hours are required for a diagnosis of epilepsy.

Fortunately, you can control and reduce seizures with medicines, lifestyle changes and herbal remedies.

how to deal with epilepsy

Here are the top 10 ways to deal with epilepsy. These remedies, however, are not a substitute for the medicines prescribed by your doctor.

1. Coconut Oil
Coconut oil is highly effective in the treatment of epilepsy. The fatty acids (medium-chain triglycerides) in coconut oil have therapeutic effects on brain cells. Moreover, they supply energy for the brain cells, which helps relieve symptoms of epilepsy.

Have 1 teaspoon of extra-virgin coconut oil 3 times a day. You can gradually increase the amount to a few tablespoons a day.
Also, use coconut oil for cooking, in salad dressings and as a spread.

2. Epsom Salt
Studies show that Epsom salt is also effective in reducing seizures in people with epilepsy. The magnesium sulfate in Epsom salt changes physiochemical cell relationships in the brain, which in turn lessens the frequency of seizures and convulsions.

Crush pure grade Epsom salt into a very fine powder. Add ½ teaspoon of the powder to a glass of orange juice or water and drink it each morning.
You can also enjoy relaxing and soothing Epsom salt baths 2 or 3 times a week.

3. Limes
A popular Ayurvedic remedy for epilepsy is limes. Limes help improve blood circulation to the brain. Moreover, they help normalize excessive calcium that may hamper brain functionality.

Mix 2 tablespoons of fresh lime juice and ½ teaspoon of baking soda in a glass of water. Drink it daily before going to bed.
You can also apply fresh lime juice on your head and massage thoroughly for a few minutes. Do this daily before taking a shower.

4. Garlic
Garlic is also useful in treating epilepsy. Its antioxidant, antispasmodic and anti-inflammatory properties help destroy harmful free radicals in the body and promote proper functioning of the nervous system. This in turn prevents seizures and other epilepsy-related symptoms.

Mix together ½ cup each of milk and water. Heat it to a boil. Add 4 to 5 crushed garlic cloves and boil until the mixture reduces by half. Strain and drink it once daily.
Alternatively, take garlic supplements daily. Consult your doctor for the correct dosage.

5. Passionflower
The herb passionflower also helps reduce seizures. It contains a chemical known as chrysin, which helps increase the amount of gamma aminobutyric acid (GABA) in the brain. This in turn reduces frequency of seizures as well as anxiety.

Drink 1 to 2 cups of herbal tea prepared with passionflower. Steep 1 teaspoon of dried passionflower in a cup of boiling water for 10 minutes, then strain it.
Passionflower is also available in capsule, tablet, liquid extract and tincture forms. Always take this herb under the guidance of a doctor.
Note: Avoid passionflower if you are pregnant or breast-feeding. Also, consult your doctor before taking this herb as it may increase the effects of anti-seizure medications.

6. Winter Melon
According to Ayurveda, winter melon, also known as ash gourd, is an effective home remedy for epilepsy due to its nutritional and medicinal properties. This vegetable helps keep the nervous system healthy and ensures smooth functioning of the brain cells.

Drink ½ glass of winter melon juice daily in the morning on an empty stomach. To enhance the taste, you can add a little sugar.
Another option is to extract the juice of a bowl of crushed winter melon. Add 1 to 2 teaspoons of licorice powder to it and mix well. Drink this solution once daily.

7. Exercise
Regular physical exercise improves fitness, energy and mood, which in turn helps reduce seizures and the impact of epilepsy on one’s life. Moreover, exercise releases feel-good hormones into the brain and increases oxygen flow to the brain.

Do warm up and stretching exercises daily to feel more relaxed.
Walking is one of the easiest and safest exercises that people with epilepsy should do. Walk for 45 minutes, at least 4 times a week.
Swimming and other water sports can be great exercise.
Gardening and other relaxing activities like tai chi are also great exercises.
Note: Drink water before and after exercise to prevent dehydration. In addition, stop and rest if you are feeling tired.

8. Yoga
Yoga is an age-old practice that alleviates stress, induces relaxation and provides multiple health benefits for people with epilepsy. The combination of controlled deep breathing, physical postures and meditation helps control seizures and reduce other epilepsy symptoms. The top yoga poses for epilepsy are:

*Balasana (Child’s Pose)
*Nadi Shodhana (Alternate Nostril Breathing)
*Kapotasana (Pigeon Pose)
*Sirsasana (Headstand)
*Camatkarasana (Wild Thing)
As it is very important to do yoga poses in the correct manner to reap the benefits, learn them from an expert only.

9. Take Necessary Vitamins
A healthy diet is essential in the treatment of epilepsy. There are different vitamins that can help a lot. For instance, vitamin E helps control the neurons that cause seizures and anxiety disorders.

As epilepsy can occur due to vitamin B1 deficiency, eat foods high in vitamin B1 or take a supplement after consulting a doctor.
Other vitamins that can help treat epilepsy are vitamins B12, B6 and D.

Always consult a doctor before taking a supplement.

10. Acupuncture
In traditional Chinese medicine, acupuncture is a well-known treatment for seizures due to epilepsy. In acupuncture, pressure is applied to specific points on the body using fine needles.

Although its mechanism is not known, acupuncture can help alter brain activity to reduce seizures by restoring the flow of qi (energy) throughout the body.

To enjoy the benefits of acupuncture, get it done by an expert only.

Additional Tips:

*Get enough sleep as sleep deprivation can trigger seizures.
*If you have seizures regularly, wear a medical alert bracelet. This will help people know about your condition.
*Manage stress and avoid stressful situations.
*Drink ½ glass of grape juice daily.
*Limit your intake of alcohol and avoid smoking.
*As low calcium and magnesium can trigger seizures, eat foods high in these nutrients.
*Keep a written record of any seizures you have and keep your doctor updated.
*Avoid all “white” products, including white sugar, white flour, table salt and white rice.
*Do not consume artificial sweeteners or additives.
*Do not skip meals, especially breakfast.
Follow the ketogenic diet, even though the restrictions can be challenging.

Lastly, take the medicines prescribed by your doctor in correct dosages in a timely manner. Do not stop taking your medicines without your doctor’s approval.

Wednesday 30 November 2016

You Want To Get Rid Of Dark Knees?

You Want To Get Rid Of Dark Knees?

Do you long to wear those short skirts and sleeveless tops but can’t due to your black knees and elbow? Or are you that guy who often becomes conscious while in gym because of dark knees and elbows and lose focus on exercising? 

These dark zones of our bodies do make us embarrassed now and then. If you had not sat with your elbow’s support on your desk or not have kneeled down so many times for sports or prayers or for any other work, probably you wouldn’t have got those dark knees and elbows. Or is it because you regularly forget these body areas while exfoliating and cleaning other parts of your body? Whatever is the reason, the good news is that with a little effort and some great home remedies, you can get rid of black knees and elbow. 

The greatest of these is the lemon juice- the mother of all remedies for any dark area on your skin. So, I am not going to include lime juice in this list of home remedies. You can use it as and when it suits you.

How to Get Rid of Black Knees:
Traditional Way for Even Toned Skin- Oil Massage:
In ancient times, when there were no cosmetics an all, people then too have smooth and fine even toned skin. They used to apply oil and in many countries, it was a pre bath ritual to have full body massage with oil. In today’s hectic times, massage has become luxury rather than a routine. Knees and elbows are one of the most dry parts of our body and they need regular moisturization. Oils can help them remain moist, smooth and even toned without dark patches.

*Apply any natural oil in its pure form to your darkened knes or elbow. Some of the suggestions include olive oil, sesame oil, almond oil or coconut oil. Massage with these oils daily.
*Rub some mustard oil on your knees/ elbow after taking bath. Massage gently for about 5-15 minutes, whatever time you can spare. 
The linoleic, oleic and erucic acids in mustard oil finely lubricate your joints and also assist in retaining the melanin pigment there. Don’t forget to wash off your joints with warm water, and if needed a mild soap, after the massage in order to save your clothes and from attracting more dirt on to skin.
*Vitamin E oil is a boon for any skin problem. Just puncture a Vitamin E capsule and take the oil in it to rub on your knees and elbow. Get smooth and clear skin within few weeks.

*Give Minty Treat to Your Blackened Joints:
Mint is not only refreshing for your mouth and other senses but also for your knees and elbow. The antiseptic and anti- inflammatory compounds of mint as well as its essential oils help in synthesizing white blood cells and collagen in our bodies. It is also capable of clearing scar tissues from within. You need a mint concoction for this remedy.

You will need:
-Mint leaves- handful of them
-Lemon juice- from half a lemon
-Water- half a cup
-Cotton ball
-Warm water to wash
Directions:
-Boil water.
-Add mint leaves and let it boil for some more time.
-Add the lemon juice in boiling mint water.
-Put off the flame.
-Let it cool for some time.
-When its temperature is tolerable for your skin, soak the cotton ball in it.
-Apply the mint-lemon concoction to your knees or elbow in the cotton ball.
-Leave for about 10-15 minutes.
-Wash off with warm water.

Take off Dead Cells with Natural Exfoliates:
It is our rough usage of knees and elbow as well as neglecting them when scrubbing off the dead skin cells from other parts of our bodies. So, its high time, you make special scrubs for your black knees and elbow with some natural ingredients.

Baking Soda plus Milk
-Take a tablespoon of baking soda
-Add some milk to it, enough to make a thick paste.
-Apply on your knees or elbow.
-Scrub gently in circular motion.
-Do it daily or alternate days as per the extent of darkness on your joints.
-When you see that the skin tone of your joints have lightened, do it once a week or fortnight.

Olive Oil plus Sugar
You need exfoliation as well as moisturizing for your darkened knees, elbows. So go for this very simple remedy.
You will need:
-Olive oil- 1 tablespoon
-Sugar- 1 tablespoon
Directions:
-Mix the oil and sugar to get a thick paste with texture granted by sugar granules. For better results, -you can even use warm olive oil.
-Apply this mixture on your knees or elbow
-Scrub gently with fingers.
-You will feel the sugar granules getting smaller in size as you keep on rubbing.
-Try to dissolve the whole sugar in the mixture otherwise rub for at least 5-10 minutes.
-Now wash off with a mild soap and water.
-Do this daily till you get rid of those dark areas. Then make it a weekly routine.

Onion plus Garlic
They both are great in food recipes due to the unique flavor they lend to the dish. Thet are equally good when combined to scrub your black knees and elbow due to their various minerals and volatile oils. They make your skin light and that’s for sure.
You will need:
-Garlic- 1 fat clove
-Onion- 1
-Grating equipment (better if it has bigger holes)
Directions:
-Peel the garlic clove and grate it, even if you find it a little difficult to do so. If you can’t at all, crush it in a way that it has small chunks and doesn’t convert into paste form.
-Grate the onion.
-Mix them both.
-Apply on knees or elbow, whereever it is dark.
-Rub gently for about 10-15 minutes.
-Wash off with water.
-If you can’t stand the smell, use a mild soap to wash off.
-You can even apply some rose water mixed with glycerine and lime juice (I part glycerine, one part lime juice and two parts rose water) after scrubbing with garlic-onion scrub to keep the smell off your body.

Gramflour plus Yogurt:
Gram flour or chick pea flour, due to its variety of vitamins , minerals as well as proteins, act as an excellent exfoliant. This flour is a great remedy for pigmentation and blemishes as well as for dark skin tones.
You will need:
-Gramflour- 2 tablespoons
-Curd- enough to make thick paste
Directions:
-Mix gramflour and curd.
-Apply on your darkened elbow or knees.
-Let it be there for sometime, about 15-20 minutes.
-Using your fingers, rub in circular motion for about 5-10 minutes.
-Wash off with water.
-If your skin ultra dry, you may also consider using fresh cream in place of yogurt for getting good moisturizing effect. Those with oily skin can consider replacing yogurt with milk.

Yogurt plus Almond:
Almond is good for health and almond oil is good for skin too. If you are using almond oil to lighten your skin tone, well and good. You can even use almonds for exfoliating your knees and elbow.

You will need:
-Yogurt- 2 tablespoons
-Almonds- 8-10
Directions:
-Ground almonds coarsely. Watch that they don’t get smoothely powdered.
-Add yogurt to coarse almond powder.
-Apply on black knees and elbow.
-Leave for 15 minutes or till it dries up.
-Rub gently with wet fingers.
-Scrub in circular motion.
-Wash off with water.
-Do it daily once or twice a week.

Coconut Oil plus Walnut:
The skin friendly coconut oil with all its minerals, fatty acids and other nutrients nourish your joints skin wihle walnut exfoliates them excellently.

You will need
-Coconut oil- 1 tablespoon
-Walnut- 3-4
Directions
-Coarsly ground walnut. Don’t make it smooth.
-Add coarse walnut powder to coconut oil.
-Apply on knees/ elbow.
-Rub in circular motion for 10-15 minutes.
-Wash off with warm water.

Lighten the Skin Tone with Natural Bleaching Agents
Exfoliation and Moisturizing are basic to any skin care routine and more so for black knees and elbow. However, if they have become very dark, you may also need to bleach them but don’t go for those laden with chemicals. They may leave your knees darker than before. Use some natural bleaches to whiten the skin tomne of your dark knees and elbows.

Lemon and Honey
Lemon juice is the best natural bleach and honey, the best natural moisturizer.

You will need:
-Lime juice- from 1 lemon
-Honey- 1 tablespoon
Directions:
-Mix lemon juice and honey.
-Apply on dark areas.
-Leave for 15-20 minutes.
-Wash off with water.
Initially do this everyday. Then thrice, twice and once a week as you see your skin tone getting lighter with time.

Bleaching Fruits and Veggies
While lemon is the best bleach, there are many other fruits and vegetables that have fine bleaching properties. You can use them to lighten the skin tone of your dark knees or elbow. Cut a slice, grate them or take out their juice. Slices can be rubbed as can be the grated things. Juices can be applied for 15-20 minutes. Procedure is simila, just the ingredients change. Use one or many of the following 

fruits or vegetables.
-Potato
-Cucumber
-Tomato
-Grapes
-Oranges

Yogurt and Vinegar
While yogurt helps in making some very good exfoliates, it is also an excellent bleach due to the presence of lactic acid in it. When it combines with yet another good bleach, the vinegar with its acetic acid, your knees and elbows can’t help than getting lighter.

You will need:
-Yougurt- 1 tablespoon
-Vinegar- 1 teaspoon
Directions:
-Mix yogurt and vinegar.
-Apply on dark knees and elbow.
-Leave for 20 minutes.
-Wash off with water.

This can be done daily as curd is very mild on skin. It also balances the acid of vinegar.
If you use one or more of these home remedies for black knees and elbow and keep them clean and moisturized, you’ll never have to be in dilemma of whether to wear short skirts/ sleeveless tops or not!

Are You Worried About Your Dry Skin ?Try Home Remedies.

Are You Worried About Your Dry Skin ?Try Home Remedies.


Most people experience dry skin problems at some point in their lives. Dry skin is usually caused by environmental conditions, genetics or excessive bathing and can occur anywhere on the body. If you suffer from dry skin, don't worry there are many things you can do to hydrate your skin and prevent it from drying out again.

*Moisturizing from the Outside:

1)Moisturize frequently and consistently. 
The need to moisturize your skin when it's dry may seem like a no-brainer, but it's important that you know how to moisturize effectively. For instance, piling on an inch-thick layer of moisturizer once a week isn't going to do your skin much good. You need to be moisturizing frequently and consistently in order to effectively combat dry skin.

*Keep a facial moisturizer beside your bed. This will make it easier to remember to moisturize every night before you go to sleep. Make it a part of your nightly routine.
*If you suffer from dry hands, keep a small tube of hand cream in your hand bag or beside your sink. Use every time you wash your hands.

2)Moisturize when your skin is damp. 
Moisturizing when your skin is still slightly wet helps to seal in more hydration. After you wash your face, pat off the excess moisture with a towel before applying your moisturizer. For your body, do the same thing. Pat your skin with a towel until it's just slightly damp, then apply a good moisturizer. Allow your skin to dry naturally so it can absorb all the moisture.

*If you're skin still feels dry, apply a second layer of moisturizer once the first layer has soaked in.

3)Change your products. 
You may need to change the products you use, according to changes in your skin or the time of year. In colder months, you may to switch to a richer moisturizer. In summer, you should use one with an SPF. If you have combination skin, it may be necessary to use a lighter moisturizer on the parts of your skin that gets oily (like your t-zone) and a heavier one where your skin gets dry.

4)Choose the right cleansers. 
Be careful when choosing a facial or body cleanser, as some cleansers can strip moisture from the skin. Opt for a gentle cream or milk cleanser that will moisturize the skin as it cleanses. Also try to stay away from heavily-fragranced cleansers as the chemicals behind scents can be drying.

5)Exfoliate gently. 
Exfoliating can be great for sloughing off dead skin cells and for smoothing the skin. However, many facial scrubs can also strip the skin of moisture and irritate dry skin. This is why it is important to exfoliate gently, using the right products and techniques.

*The ingredients in many facial scrubs can strip the skin of essential moisture. Instead of a facial scrub, use a damp baby's washcloth to massage your face in small, circular motions in order to gently, yet effectively exfoliate.
*Get rid of gritty, abrasive body scrubs and try using a loofah, exfoliating gloves or a dry skin brush to gently exfoliate the skin.
*Always moisturize your skin directly after exfoliating.

6)Limit the use of "treatment" products. 
A lot of times, dry skin is a side effect of using certain treatments, like ones for acne and wrinkles. If you are trying to clear your skin or fight off aging, this doesn't mean you have to stop using those treatments completely. It simply means you should use them less frequently because certain active ingredients in such treatments can exacerbate dry skin, especially in the winter.

7)Relieve itchy skin. 
Dry skin often leads to itchy skin, but scratching can make dry skin worse, and even damage the skin. Sometimes moisturizing alone will help to ease any dry-skin related itchiness, but if you need some extra relief, try a hydrocortisone cream or over-the-counter anti-itch lotion.

*Hydrating from the Inside:

1)Drink lots of water.
Water flushes toxins from your system and carries nutrients to your cells. This helps to prevent dry skin by keeping your skin nourished and hydrated. You should aim to drink at least two liters of water per day.

2)Eat fresh fruit and vegetables. 
A healthy and balanced diet will help your skin by providing the vitamins and nutrients that the body needs to stay healthy and hydrated. Try to eat at least 2 portions of green, leafy vegetables and 2 portions of seasonal fruits daily. Fruit and veg with a high-water content, such as watermelon, broccoli and tomatoes, are especially good for hydration.

3)Eat healthy fats. 
Eating foods containing the good types of fat contributes to the body's overall health - increasing blood flow and the delivery of nutrients to all the body's cells, including skin. Try to eat more foods containing monounsaturated fat, such as avocados, olives and peanut butter, and more foods containing polyunsaturated fats, such as salmon, walnuts and tofu.

4)Take supplements. 
Taking supplements is an easy and effective way to increase your intake of key nutrients and vitamins, which help to promote healthy and hydrated skin. Try taking a fish oil supplement, which is great for dry skin and eyes, or increase your intake of vitamin E, an antioxidant which repairs and protects skin.

5)Cut back on salty and fried foods. 
Salty and fried foods will dehydrate the body, exacerbating dry skin problems. Limit your intake of these foods as much as possible to avoid dehydration and benefit your overall health.

6)Don't smoke. 
The negative side effects of smoking are well-documented, but you may not know that smoking is also bad for the skin. The tar contained in cigarettes clogs the pores, leading to blackheads and breakouts. Smoking hampers your breathing ability which inhibits circulation and deprives the skin cells of oxygen. Smoking also depletes the tissues of vitamin C, which is essential for healthy-looking skin.

7)Limit alcohol intake. 
Alcohol dehydrates the body, thus dehydrating the skin. It decreases the body's ability to absorb fluids, leading to a loss of water, electrolytes and minerals. This causes dry, red, easily irritated skin. Try to drink alcohol in moderation, and when you are drinking, have a glass of water between drinks.

*Preventing Dry Skin:

1)Avoid excessive bathing. 
Do not shower or wash your face too much, as this will dry out your skin. In order to avoid dryness, you should limit your bathing to just one bath or shower a day. You should also avoid steaming your skin and washing with water that is too hot.

*Use warm or lukewarm water so hydration isn't stripped from your skin. Water that's too hot tends to wash away your skin's protective lipid barrier.
*For the same reason, you should also avoid taking long showers or baths.

2)Moisturize all year round.
This may be obvious to some people, but not so much to others. By moisturizing all year round, your skin will be prepared for whatever the seasons throw at it, whether it's biting winter winds or scorching summer heat.

*People with sensitive skin should avoid creams containing fragrances or lanolin as these can cause the skin to react negatively.
*Try to get your hands on products that contain either glycerin or hyaluronic acid, as both of these substances are fantastically hydrating for the skin.

3)Wear sunscreen. 
If you spend a lot of time outdoors, it's imperative that you protect your face with a cream or moisturizer that contains an SPF of 15 or higher. This will protect the sensitive skin on your face from damaging sun rays, which cause burns, sun spots and even wrinkles. Remember that you can burn your skin all year round, so sunscreen isn't just for summer.

4)Use a humidifier. 
If the air in your house is very dry, your skin could be drying out as you sleep, leaving it feeling rough and flaky come morning. To counteract this effect, try putting a humidifier in your bedroom which you can turn on while you sleep.

*Putting a bowl or pot of water next to the radiator in your bedroom is a low-cost, DIY alternative to using a humidifier.
*Alternatively, try using a natural plant humidifier, such as a Boston palm, a bamboo fern, or a Ficus alii. These plants raise the level of water vapor in the air through transpiration so try putting one in your bedroom, it'll help your skin while giving your bedroom a tropical feel!

5)Cover up. 
Protect your skin from the elements by covering up as much as possible. In winter, protect your skin from drying winds by wearing hats, scarves and gloves. Wear a protective chapstick to shield your lips. In summer, wear a baseball cap or sunhat to protect your face from harsh rays of sun, and wear loose, light, long-sleeved shirts and pants to prevent skin from burning.

*Home Treatments:

1)Use petroleum jelly. 
The hydrating properties of petroleum jelly cannot be understated. Petroleum jelly is very emollient and actually forms a barrier that prevents moisture from evaporating from the surface of the skin.[1] It is also a cheap and cheerful option for treating dry skin on a budget.

*As petroleum jelly can be thick and sticky, it may be best to apply it at night. Try dampening your skin, putting on a layer of your regular moisturizer, then a applying a thin layer of petroleum jelly to seal everything in.
*You can also use petroleum jelly for dry hands and feet. Coat your hands and feet with a layer of petroleum jelly before bed. Cover them with cotton gloves and socks to promote absorption and prevent the jelly from rubbing off on your sheets. Your skin will be supple and moist in the morning.

2)Use avocado. 
Mash up one half of a fresh, ripe avocado, then add in a quarter cup of organic honey. Include a teaspoon of milk or yogurt, if desired. Smear this creamy skincare recipe on your face and neck. Finally, wash it off with cool water after 10 minutes for super-nourished skin.

3)Use banana. 
Banana can rejuvenate dry skin, making it soft and supple. Mash up half of a banana in a bowl and spread it onto your face and neck. After 5 to 10 minutes, you may rinse it off with lukewarm water. To increase the effectiveness of this facial mask, you can add a teaspoon of honey to the banana.

4)Use milk. 
Milk has been used as a hydrating beauty balm for a very long time - in fact, Queen Cleopatra used to bathe in it! If this seems a little extreme, try washing your face with milk to hydrate the skin and reduce blemishes. The best way to do this is by pouring a little whole fat milk into a cup, dipping a soft washcloth into it, then massaging the milk into your skin. The lactic acid gently cleanses the skin, while the high fat content is good for moisturization.

5)Use mayonnaise. 
Mayonnaise is considered excellent for dry skin. Apply a mixture of two tablespoons of mayonnaise, a tablespoon of lemon juice, and half a teaspoon of honey directly to your face and leave for about ten minutes. For best results, use this mayonnaise mask once a week.

6)Make a sugar scrub. 
You can make your own sugar scrub for exfoliating and hydrating dry skin using just half a cup of brown or white sugar and a splash of olive oil. If you like, you can also add a drop or two of a fragrant essential oil such as mint or vanilla extract, or a teaspoon of softening honey.

7)Use aloe vera. 
Aloe helps to rehydrate the skin and also naturally reduces redness and inflammation. To use, break off a leaf from an aloe vera plant and rub the clear, sticky sap all over your face. Leave it on for 15 minutes, then rinse off. For best results, apply an aloe mask once or twice a week. You can easily get an aloe vera plant at a nursery or home improvement store.

8)Use oils. 
Natural oils such as olive oil, almond oil and coconut oil are all fantastic home remedies for dry and flaking skin. Simply apply a thin layer of the oil of your choice onto your skin, morning and night, for softer, smoother skin.

9)Use an ice cube. 
Try rubbing an ice cube all over your face, this makes your blood circulate round your face more, and brings moisture to the surface. Great for getting rid of dry skin and having a glowing face!

10)Use glycerine. 
Take few drops of glycerine and apply it all around your face and neck. Leave it on your face for 20 minutes, then wash it off with lukewarm water. You'll get a glowing and supple face.

Tips:
*Don't rub your dry skin as it might leave a bright red mark and irritation, no-one wants that!!
*Don't use sugar scrub. The sugar is actually quite sharp when looked at through a microscope. It will scrape your skin leaving it red and damaged. The dry skin may even stay.
*If you don't get favorable results with the above steps, consult a cosmetologist/dermatologist.
*Get eczema moisturizer and soap from your local GP and use it every day as part of your daily routine. Creams like Dermol and Diprobase are recommended.
*Wear cotton gloves and socks most of the time, it can help protect it.
*Drinking juice can help relieve eczema.
*Try oil cleansing method.

How to Make Fabric Softener At Home ?


How to Make Fabric Softener At Home ?

If you want a more ecological or more economical alternative to commercial fabric softeners, you can make your own at home. Here are a few simple methods you can use.

*Vinegar:

1)Combine 1 gallon (3.8 L) vinegar with 25 to 30 drops essential oil. 
Stir the essential oil directly into the container of white distilled vinegar for a minute or so to ensure that the two liquids combine well.

*Note that the essential oil is not necessary. The vinegar is the component responsible for softening clothes. It strips away residue on your clothes that would otherwise make them stiff, and it has properties that can break down some of the minerals found in hard water supplies.
*If you do decide to use essential oils, you can use any scents you want.

2)Add 1/4 cup (60 ml) to your rinse cycle. 
For a normal load, fill a fabric softener ball with 1/4 cup (60 ml) of the fabric softener solution or add the same amount directly to the washer just before the rinse cycle begins.

*Do not add the fabric softener to the machine before its primary wash cycle.
*Pour the rest of the fabric softener into a storage container. Make sure that this fabric softener is labeled so that you do not accidentally use it for another purpose. Shake or stir well to before each use to make sure that the essential oil and vinegar have not separated as it sat.

3)Continue through a standard rinse cycle. 
You do not need to do anything special from this point on. Let your rinse cycle finish up as it normally would.

*Vinegar and Baking Soda:

1)Combine baking soda and hot water. 
Stir 1 cup (250 ml) baking soda into 2 cups (500 ml) hot water until well combined. Combine the two ingredients in a large bucket or other container.

*Note that the baking soda will not dissolve, but it should be completely soaked.
*This homemade fabric softener is often praised by people who have hard water.
*Baking soda regulates the pH level in your rinse water, preventing it from becoming too acidic or too alkaline. It also cancels out mineral deposits, like those found in hard water. These mineral deposits are often responsible for making clothes stiff.

2)Slowly add the vinegar. 
Slowly add 1 cup (250 ml) white distilled vinegar to the mixture. Stir gently until the baking soda is dissolved.

*The vinegar will react with the baking soda, causing a fizzy chemical reaction. Do not pour the vinegar too quickly or you will end up with a mess.
*Vinegar strips soap and residue from clothing and also helps to soften hard water.
*Some believe that the vinegar and baking soda cancel each other out, making them ineffective. The salt that is produced from the chemical reaction acts as a buffer in the rinse cycle, however. Moreover, many of the elements that help soften clothes remain in the solution even after the reaction occurs.

3)Scent the fabric softener, if desired. 
If you want to make scented fabric softener, then you need to add essential oil or scent booster to the ingredients. Stir either option directly into the fabric softener solution.

*If using essential oils, 25 to 30 drops should be sufficient.
*If using scent booster, add 1/4 to 1/2 cup (60 to 125 ml) of the crystals to your water and stir until dissolved.
*Scent booster is usually found in the laundry aisle. It is not a natural product, so it may not be preferable from an ecological sense, but it will lend your fabric softener a pleasant scent and may save you money in the long run.

4)Pour 1/4 cup (60 ml) into your washing machine during the rinse cycle. 
For a normal load, fill a fabric softener ball with 1/4 cup (60 ml) of the fabric softener solution or add the same amount directly to the washer just before the rinse cycle begins.

*Do not add the fabric softener to the machine before its primary wash cycle.
*Pour the rest of the fabric softener into a storage container. Shake or stir well to combine before each use.

5)Run the rinse cycle as usual. 
You do not need to do anything special from this point on. Let your rinse cycle finish up as it normally would.

*Conditioner:

1)Combine vinegar, hair conditioner, and hot water.
In a large bucket or other container, stir together 3 cups (750 ml) white distilled vinegar, 2 cups (500 ml) hair conditioner, and 6 cups (1500 ml) hot water until evenly combined.

*You can use any hair conditioner you want for this method. To make it more cost effective, choose a cheap brand.
*Since there are many varieties and scents of conditioner available on the market, your scent options are nearly endless.
*Note that this is not an "all natural" solution, but it is quite effective. The vinegar strips aways stiffening residue and the conditioner softens fibers.

2)Add 1/4 to 1/2 cup (60 to 125 ml) to your washing machine just before the rinse cycle. 
For a normal load, fill a fabric softener ball with 1/4 cup to 1/2 cup (60 ml to 125 ml) of the fabric softener solution or add the same amount directly to the washer just before the rinse cycle begins.

*Do not add the fabric softener to the machine before its primary wash cycle.
*Pour the rest of the fabric softener into a storage container. Shake or stir well to combine before each use.

3)Run the rinse cycle as usual. 
You do not need to do anything special from this point on. Let your rinse cycle finish up as it normally would.

*Fabric Softener Sheets:

1)Cut cotton cloth into small squares. 
Cut clean cotton cloth into squares that are roughly 5 inches (12.7 cm) along each side.

*Cotton works well because it is a natural fiber and relatively breathable. Avoid fabrics with fibers that are spaced too tightly together. Also avoid synthetic fabrics.
*You can use a rag or old piece of cloth for this, but make sure that the material you use is clean.

2)Spray each square with white vinegar. 
Fill a small spray bottle with undiluted distilled white vinegar. Spray both sides of each square until moist to the touch.

*Let dry slightly. The cloth can be moist, but it should not be dripping wet by the time you add it to the dryer.
*The vinegar is the only element in this fabric softener formula that lends itself to actually softening your clothes. It may not be as strong as a liquid fabric softener using vinegar, but some of the effects should still remain.

3)Add a few drops of essential oil onto one square. 
Drop 3 to 5 drops of your favorite essential oil onto a cloth square. Spread the drops out so that they seep into the fibers of the entire square.

*The essential oil will give your clothes a pleasant yet mild fragrance. You can technically use this method without the use of essential oils, but since the softening effects are less powerful than a liquid fabric softener alternative, it would make more sense to take advantage of the deodorizing and re-scenting abilities of this method.

4)Throw the scented fabric into your dryer. 
Place the scented fabric softener sheet directly into your dryer as you prepare to dry a load of clothes. Run a standard drying cycle. You do not need to do anything special from this point on.

*Each dryer sheet can be used for two or three loads, but you may need to refresh the scent by adding 3 drops or more of the essential oil before use. Refresh the softening properties by giving the sheet another quick spray of vinegar.

*Fabric Softener Crystals:

1)Mix coarse salt and essential oil.
Add 20 to 30 drops of your favorite essential oil to 2 cups (500 ml) of Epsom salt or coarse sea salt in a medium bowl or container.

*Stir well until all of the essential oil has been spread over and absorbed by the salt.
*You can use any scent of essential oil you want to use. If desired, you can even combine scents to create your own unique fragrance.

2)Stir in baking soda. 
Mix 1/2 cup (125 ml) of baking soda into the scented salts until evenly distributed.

*Alternatively, you could leave the baking soda out altogether and add it to your machine separately during the wash.

3)Add 2 to 3 Tbsp (30 to 45 ml) to the rinse cycle.
 Before your washing machine enters a rinse cycle, add the scented crystals directly to the water in your machine.

*Only use 2 to 3 Tbsp (30 to 45 ml) of the fabric softener crystals.
*If you did not add baking soda to the crystals, you can add up to 1/2 cup (125 ml) of baking soda in conjunction with this fabric softener per normal load of laundry.
*Do not add the fabric softener crystals to the start of the washing cycle, before the washing part actually takes place. Only add it to the washing machine during the rinse cycle.

4)Run the rinse cycle as usual. 
You do not need to do anything special from this point on. Let your rinse cycle finish up as it normally would.

Warnings:
Never mix vinegar and chlorine bleach. Doing so produces a dangerous gas.
Do not use apple cider vinegar or another tinted vinegar for any of these recipes. Tinted vinegars will stain or darken your clothes.

HOW TO MAKE SAMOSAS LIKE A CHEF?

Samosas are a little different from your standard vegetable samosa. They have a delightful aroma, a taste and the added delicious experience of crispness from the frying. Give these samosas a try and you may just find they become a firm family favorite.

When it comes to Asian appetizers, samosas seem to be at the top of everyone's list. Eating these crispy, golden triangular-shaped patties is no doubt a treat. Making them, however, can be a challenge for home cooks. That is, until today. We've got here the ultimate guide for how to make samosas like a native chef.

Samosas hail from Asian and there are countless ways to prepare them some people favor meat or chicken fillings but the most popular samosas, by far, are the ones with a potato and green pea filling . In aasia, you'll find samosas being sold on street corners, at roadside shacks or fancy restaurants, and prepared for family gatherings where they are commonly enjoyed with a nice cup of masala chai.

The Basics

Before learning how to make samosas it is imperative to make sure you have all the ingredients on hand. The traditional recipe calls for white flour - not whole-wheat, spelt or buckwheat four. That's because white flour yields a soft pliable dough that results in flaky samosas. Who wouldn't want to bite into that? You can, of course, use a mix of whole-wheat and white flour but it won't yield the ultimate tender crust.

You'll also need to have a few spices on hand, such as turmeric, coriander seeds, fennel seeds, cumin seeds and garam masala (that’s just covering the basics!). Can you do without one or two of those? Sure, but if your aim to is get that authentic Indian flavor you're better off taking a trip to the nearest spice shop.

Plan of Action

Most chefs will agree that the best plan of action is to divide the work in two sections. A great tip is to make the filling the day before you intend to serve the samosas so making them will be a breeze. Time doesn't always allow for that so you can always make the filling while the samosa dough is resting (ideally, you'd boil the potatoes ahead of time).

Once you learn how to make samosas, you'll see that it's not as complicated as you thought. The biggest challenge in the entire process is mastering the triangular shape. Below is a step-by-step guide that will help you learn to fold samosas once and for all. It's fair to point out there are many other ways to fold samosas but the method below is the traditional one used in the region of Punjab.

HOW TO MAKE SAMOSAS LIKE A CHEF?

Potato Samosa Recipe
makes 8 samosas

For the dough:

1/2 cup all purpose flour
1/4 teaspoon salt
1/2 teaspoon ajwain (carom seeds), optional
1 1/2 tablespoons vegetable oil
1/4 cup minus 2 tablespoon lukewarm water

Filling:

3 large boiled potatoes, peeled and chopped into very small cubes
1 small onion, chopped finely
1/2 teaspoon turmeric
1/2 teaspoon cumin seeds
2 chopped green chilies (more if you like it spicy - I like to double the amount)
1 teaspoon coriander seeds, freshly ground
1/4 teaspoon garam masala
1 teaspoon amchur (mango powder), or the juice of one fresh lemon
1 teaspoon salt
1/2 cup green peas (frozen)
10 sprigs of cilantro, chopped
2 tablespoons vegetable oil for sautéing

For paste to seal pastries:

2 tablespoons of water + 1 tablespoon white flour

Preparation: 

1. Use a medium bowl to prepare the dough. Begin by mixing the flour, salt and oil with your hands, rubbing together thoroughly so the oil gets incorporated into every bit of the flour (this will yield a flaky dough). Slowly add the water until you form a ball of dough, adding more water if needed. Knead the dough for about 2 minutes until smooth. Wrap it in plastic and set it aside for 20 min.

2. For the filling, heat the vegetable oil in a sauté pan. When warm, add the cumin seeds and onions. Cook until translucent, then add the chilies, turmeric and peas. When the peas are cooked through add the potatoes, garam masala and mango powder (if using). Cook until warmed through and ingredients are mixed together. Turn off heat. Adjust the salt and add cilantro. If using fresh lemon juice, add it now and mix throughly.

To assemble samosas:

1. Divide the dough into four small balls. Roll each ball into a circle about 5 inches wide. Cut each circle in half. Each half moon will yield one samosa. You should end up with 8 half moons.

2. For each half moon: dip your finger in the flour/water paste and run along the edges. Roll into triangular shape as pictured above, making sure to seal the edges tightly. Set aside on a floured surface. Work quickly to prevent the samosas from drying out.

3. Dust off any excess flour and deep fry samosas until golden. Serve with chutney, yogurt sauce or ketchup.

Chef's tip:

 For the ultimate crispy flaky samosa, fry them twice: once at 350F and the second time around at 375F. If you plan on freezing samosas, fry them just once. Let cool and freeze.

Tuesday 29 November 2016

How to Be Talented?

How to Be Talented?

Talent tends to refer to that inborn skill that everyone seems to be born with. It's true that having a talent can help you in life, and that it's good to try and identify and practice that skill. However, try and avoid placing too much importance on finding a talent. Plenty of people go through life perfectly happy, and perfectly able to learn skills, without having one specific and specialized talent.

*Discovering Your Talent:

1)Revisit your childhood. 
A good way to figure out where your talents lie is to go back to your childhood and think about what it was you wanted to do as a kid. This is often the time when you had plans that weren't limited by what people tend to think of as "reality."

*Fear of failure is one of the things that tends to hold you back from achieving or finding your talent. By returning to childhood, you're taking yourself out of that fear of failure or limitations mindset.
*Consider what it was you wanted to do when you were a child, and consider the things that you loved to do as a child. This doesn't mean that you get to raise dragons (sorry), or anything like that, but it can set you on a path towards your talent. For example, you might not be able to raise dragons but you might turn that desire towards writing stories, or leading a dragon camp at your local library.

2)Consider what it is you do when you lose track of time. 
One of the chief things you can do is focus on what you love to do so much that you have a tendency to forget everything else for awhile. Remember, not all talents are going to be super obvious. You might have to delve a bit deeper into the things you enjoy to discover what makes you tick.

*For example, if what you really love is playing video games, that can absolutely be a talent. While you might not be able to play them as your job, you can still find ways to use that talent.
*Consider questions like: What is it you fantasize about doing when you're bored at work or school? If you were given unlimited funds, what would you do with that? If you could go anywhere in the world, where would you go? If you didn't have to work, how would you occupy your day? Answering these and similar questions can help you uncover what you're good at and what inspires you.

3)Ask others. 
Sometimes, when you're having difficulty seeing clearly, it's good to get an outside opinion. Your friends and family members know you well and they should be able to offer you some insights into the areas where they think you're talented.

*Sometimes the areas you wish to have talent, aren't necessarily where others see you as having talent. That's okay! Just because you don't have an inborn talent at something, doesn't mean you can't be good at it and just because you have a talent at something doesn't mean that you need to pursue that in your life.
*For example: your family and friends might point to your talent as lying in the area of math, especially accounting and figures, but your true passions lie in rock-climbing. Instead of thinking you should throw in the towel on rock-climbing, consider using your math abilities to help you fund your rock-climbing passion.

4)Try new things. 
Especially if you're not sure what your talents might be, you should get out and try new things. This way you're more likely to hit on what it is that you're really good and that really makes you tick.

*Observe and enjoy the talents of other people. In your quest for you own talent you should look into the talents of other people. Think about the people that you know who are talents (maybe your father is an amazing cook, maybe your mom has an amazing ability to listen) and enjoy their talents.
*Go out in your community. Take classes offered at your local university; attend lectures or author meets at your local library or bookstore; try out cooking, rock-climbing, or mentoring at the local school.

5)Create space. 
While it is good to get the opinions of others, sometimes you need to give yourself time and space to figure things out for yourself. You don't want to be completely driven by other people's opinions.

*A lot of people find their talent through a moment that changes their life, that isn't scripted, or expected. It can happen that a brilliant musician attends a certain performance, which ignites a love of music in them. So, when confronted with something that might trigger that change in you, sit quietly and absorb the experience.
*Go solo. Do things by yourself, especially new things. This will give you time to figure out whether you have a talent for something without feeling like you have to perform one way or another in front of people.

*Developing Your Talent:

1)Practice. 
While talent can be important when it comes to doing things well, the real determinate is practice. It doesn't matter how talented you are. If you don't practice, you're simply not going to be as good at something, as you could have been. In fact, in many cases, people who are naturally talented at something, so worse in the long run, because they feel like they don't have to practice.

*Set aside specific time each day that's devoted to practicing your talent. For example, if writing is your talent, set aside a half hour before work every morning to get up and write. If your talent is basketball, get out there and practice on the court.
*Focus on the areas that you're less talented in. Even if you have a talent, it doesn't mean that you're going to be talented at every aspect of something. For example, you might have a talent for capturing dialogue, but struggle to create a coherent plot.

2)Kick negativity to the curb. 
Talented or not, negative thinking can stop up your abilities quicker than anything else. The more you combat your negative thinking, the easier it will be to discover and develop your talent, because you won't be constantly second guessing yourself.

*Identify your thought patterns. The first step towards combating negativity is to notice when you're doing, and what you're doing. Perhaps you only allow the bad things into your mind (this is called filtering), or you tend to catastrophize everything. Notice how you think about yourself, about situations, and about your talent (do you for instance place undue importance on your talent?).
*Check in with your thinking every day. You have to be vigilant about your own thinking before you can work towards changing it. When you catch yourself catastrophizing ("I'm a failure because I keep forgetting to turn in my library books"), stop and identify the thought as what it is.
*Practice positive or neutral self-talk. The trick is to replace your negative thinking with positive or neutral thinking. So for example, when you start to think that you're a failure because you're having difficulty with a piano piece, turn that thought around and think "This is a challenging piece and I may have to practice harder to perform it to the standard that I would like." With a thought like that you're no longer casting value judgments on yourself.


3)Be kind to yourself and to others. 
People have a bad tendency of linking themselves to their talent and when that fails (and it does occasionally) they feel like they're a failure. To keep your sanity and your happiness, be kind to yourself about your abilities.

*Your talents are going to make you the best at everything at every time. By being kind to yourself and not having how well you, or your talent does, determine your well-being, you'll be more likely to feel happier.
*You can use your talents in the service of kindness. This can help you feel fulfilled, as rather than focusing on what your talent can do for you, you're using your talent for other people. For example, If you're a writer, you could write a story for a sick friend to help cheer them up.

4)Challenge yourself. 
Quite often talented people will hit a wall in terms of growth. Their talent has carried them as far as it can and they don't feel the need to keep developing it and growing. Remaining always in your comfort zone is a sure way to stagnate in your area of talent.

*Challenging yourself is a good way to stay humble, as well. There's nothing wrong with being proud about your accomplishments, but bragging or believing you can do no wrong is a surefire way to irritate those around you, or to lead to you taking a fall.
*Challenge yourself by going above and beyond what you've already done. Learned Spanish fluently? Work to translate a favorite book into Spanish, or start on a new language, something more difficult, like Arabic or Chinese.
*Whenever you feel like you've plateaued or conquered some aspect of your talent, take it to a new level.

5)Do other things. 
Being focused on your talent (whether it's getting a PHd in New Testament studies, or composing music) is incredibly important for improvement. However, you should make sure that you do other things, outside of your talent, so that you're not focusing all your energies on that one thing.

*Do things that don't have anything to do with your talent, things that you're really bad at, or simply things that you find fun. This way you won't be limiting yourself and you'll have a wide range of experiences to draw on. For example: if your talent lies in math, try branching out and doing art, or going to the gym and trying out yoga.
*Avoid basing your self worth on your talent and avoid basing your whole life on your talent. You can be motivated and focused without letting your talent take over your life.

*Using Your Talent:

1)Find unusual outlets for your talent. 
There are great ways to use your talents that are unexpected, especially in terms of jobs that might come about because of your talents. This could be a job that you found, or a job you created based on what you saw was needed.

*For example, just because you're a trained singer, doesn't mean that you need to go into professional opera singing. You could use your musical abilities to start a singing camp for kids, or to help ease the seriously ill.
*Look around to see what's needed in terms of your talents. If you identify a missing need you could start up your own job. For example: if your talent is getting to know people, you could start up a business dedicating to connecting people with one another in your community.

2)Find a way to incorporate your talent into your job. 
You don't necessarily have to have a job that is all about your talent. There's no reason for you not to try and incorporate it into your job, however. In fact, using your talent at work is a great way to increase your enthusiasm for your job.

*For example, if you love do artwork and you work at a coffee shop, consider decorating the specials blackboard, or turning your passion for art into learning latte art.
*Stop and consider how your talent might benefit your workplace. What is it you have to offer that might provide a creative or unusual solution to a problem?

3)Do something with your talent outside of work. 
If you can't think of a way to apply your talents to your job (and there's usually at least one way), find avenues to pursue it on your own time. There are lots of ways that you can enjoy your talent and have other people enjoy your talent, as well.

*Consider creating a video or blogging series about your talent. For example, you might use your language skills to help others learn Arabic.
*Find other people who are talented in the same manner and work with them, either online or in person. This is another great way to stay humble about your skills, but it can also be fun. These people will share your passions and help speed you along to better work.

4)Do something for your community. 
Turn that talent into a way to build community and to help other people. Think about all the people who have helped you on your road to success and try to do the same for others.

*Tutor low-income kids in your community in math skills, if math is your specialty. Participate in or create a local theater camp if acting is your talent. Offer to teach families in your city about gardening, or about fixing things, and so on and so on. You can find a million ways to give back.
*Be a mentor to someone in your field. If you've already gotten that professorship, for example, offer to mentor an up and coming graduate student in your field and help them identify their talents!

Tips:
*Never stop learning or exploring because you find it too difficult. If you let that get in the way, you will never move forward.
*Remember, what seemed hard to learn in the beginning, seems easy after having been learned.