Sewing in a zipper may seem like a daunting task for someone just learning to sew. However, while it will take some patience and practice, learning how to do it is worth your time and effort. Being able to sew in a zipper is a very useful skill to have if you want to successfully make your own clothes or other sewing projects that include zippers.
Before you rush over to your sewing machine to install a zipper, you have to review the type of installation you are going to do for your selected project. If you’re following a pattern, it’s easy to determine. If you’re designing your own project, you want to think about how you want the zipper to look and function when sewn in place. For example, if you’re sewing a zipper into the seam of a pillow, you will use a process similar to the one described below. But, if you’re planning to sew a zipper into a pair of pants, that process is slightly different.
We are not covering step-by-step instructions for all the specialty installation techniques. Our goal is to show you the standard steps to install a conventional zipper. Once you master that, you can branch out to other options.
Centered:
The zipper is centered along a seam and equal distance from either side. This is the installation we describe in detail below.
Lapped:
You see this most often on garments, especially along a front, back or side seam. The zipper is sewn close to the edge of one side of the seam, farther way on the other side of the seam, creating a lap of fabric over the zipper.
Inserted (or side placket):
This installation is similar to a centered zipper. The difference is the top and bottom of the zipper are sewn across, so your stitching forms a rectangle. You may have seen this on special occasion garments within a fitted side seam. The zipper's opening allows just enough room to get the dress on. For home décor, you might use this technique on a pillow back.
Separating:
Installing a separating zipper takes some specific tricks. Ever have the zipper pull get caught on the fabric or lining of your jacket? The teeth of a separating zipper need to be fully exposed so it can function properly.
Fly front:
It’s pretty obvious that the zipper sewn into the fly front opening of a pair of jeans is a unique process. It's sewn underneath, leaving only the curved topstitching on the outside visible.
Exposed:
A common zipper in sportswear, as well as in many of our home décor projects, in which all the teeth and part of the tape to either side of the teeth are exposed. In the main image at the top of this article, you can see several examples of this very common technique.
Concealed:
Contrary to the exposed zipper, these are hidden in the seam, which is why you can only achieve this look with an invisible zipper.
Installing a zipper
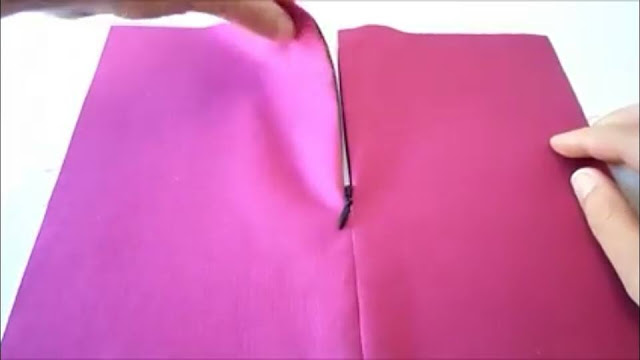
Machine baste the zipper opening closed. Sew right along the edge where you want the zipper to be eventually. Remember to sew so that your seam allowances stay the same as the rest of the garment.
*This may seem counterin tuitive but remember that a basting stitch is only temporary. It is used here simply to keep your seam in place. You will remove it after you have attached your zipper.
2.Press the seam open,
ironing the seam allowance back against the wrong side of the project. Be sure to get the seam allowance pieces as open and flat as possible, as the folds on either side of the basting stitch will need to be nice and crisp.
3.Pin your zipper into place.
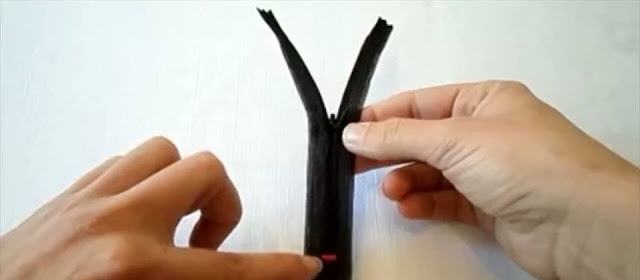
Install the zipper in its closed position. Position the top of the zipper so the pull is just above the top line of the garment.
*Any excess zipper that is laying below the end of the seam is not a problem. You want a little bit extending down, perhaps an inch or so, but any length in excess of that can be removed. Just cut off the excess zipper before you pin the zipper on and whip stitch the end to make a zipper stop.
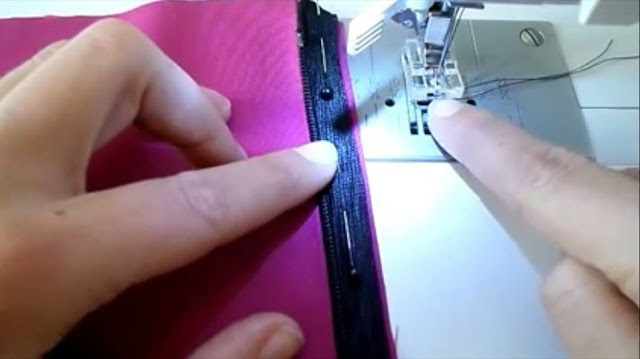
4.Machine baste the the zipper to your project.
Once again, the basting stitch will be removed later, it is just used here to keep the zipper in place. These basting stitches are necessary because they will keep the teeth of the zipper centered on the seam when you can't actually see the zipper as you sew over the right side of the project.
5.Flip the project over,
so that the right side of the fabric is facing up. You should only see the top of the zipper sticking out the top of your project. The rest of the zipper should be hidden away.
6.Use a zipper foot on your sewing machine to top stitch the seam through all fabric layers.
Sew from bottom to top on both sides of the zipper to prevent rippling. The stitches should be kept at close to the center of your seam as possible, but your zipper foot will basically lead the way.
*You will need to finish the sewing by putting a line of stitches across the bottom of the seam. This will give your zipper an end point which the pull cannot go below.
7.Remove all of the basting stitches with a seam ripper.
Begin by taking out the basting stitches that kept the zipper in place. Once those are removed, take out the basting stitches that go down the middle of the seam. This should expose the teeth of your zipper underneath.
*When taking out your basting stitches, be careful not to snag thread in your fabric or any of your permanent top stitches. A seam ripper is a great tool but it can easily cut threads that you don't want it to, so be careful.
8.Test out your zipper!
It should open and close smoothly and be centered nicely in your seam.
Hints & Tips:-
*Your zipper should normally coordinate with your project fabric, but contrasting zippers are fun too.
*Always test to make sure the zipper actually works before you sew it into your final project. It's not unheard of to get a "lemon" of a zipper, and it's just tragic to find that out after you've put it in.
*You should purchase the appropriate length zipper for you project, but, if it’s unavailable or if you have one on hand that is longer than needed but the perfect color, you can shorten a zipper by sewing a "thread stop" by hand or machine. Then, simply cut off the excess just don't use your good sewing scissors to cut with!
*If a separating zipper needs shortening this should be done from the right side. Using the same method as above, create a thread stop on either side of the zipper.
*Depending on what the zipper is made of, it may require pre-shrinking (just like your fabric).
*To care for your sewn project, always close any zippers before laundering or dry cleaning.
*Once installed, any pressing along the zipper should be done with a pressing cloth to avoid impressions, shine or puckers.
*Depending on fabric type, you can add stay stitching along the zipper opening within the seam allowance. This is the same stitching you use along curves, such as necklines and princess seams.
*If you’ve miscalculated and need additional fabric along the edge of the fabric in order to install the zipper, you can add seam binding along the raw edges.
*If you are really fancy, you can fussy cut the seam area so your zipper seam is a perfect match when closed.
*You can insert a zipper by hand, but that’s usually reserved for very specific fabrics and/or as a fine finish in couture garment sewing.
*In garment projects especially, it’s important to finish the raw edges of the seam prior to installing the zipper.
*Know your zipper foot! Some slide left to right, some require you to move the needle, or like the one we used, some are snapped on and off to switch sides of the foot. Visit your sewing machine retailer for assistance if needed.
*At the fabric store (or on the Internet), you'll find other zipper-related items available, such as stops, waxes, lubricants, even special zipper pliers.


No comments:
Post a Comment